Publishing in Ghost takes about ten minutes once you know where things are. This walkthrough follows one post from a blank editor to a live page, using screenshots from the current Ghost 6 admin. If your blog is not online yet, start with how to start a Ghost blog and come back.
Step 1: Open the editor
Sign in at yourdomain.com/ghost/. In the left sidebar choose Posts, then click New post in
the top right corner.
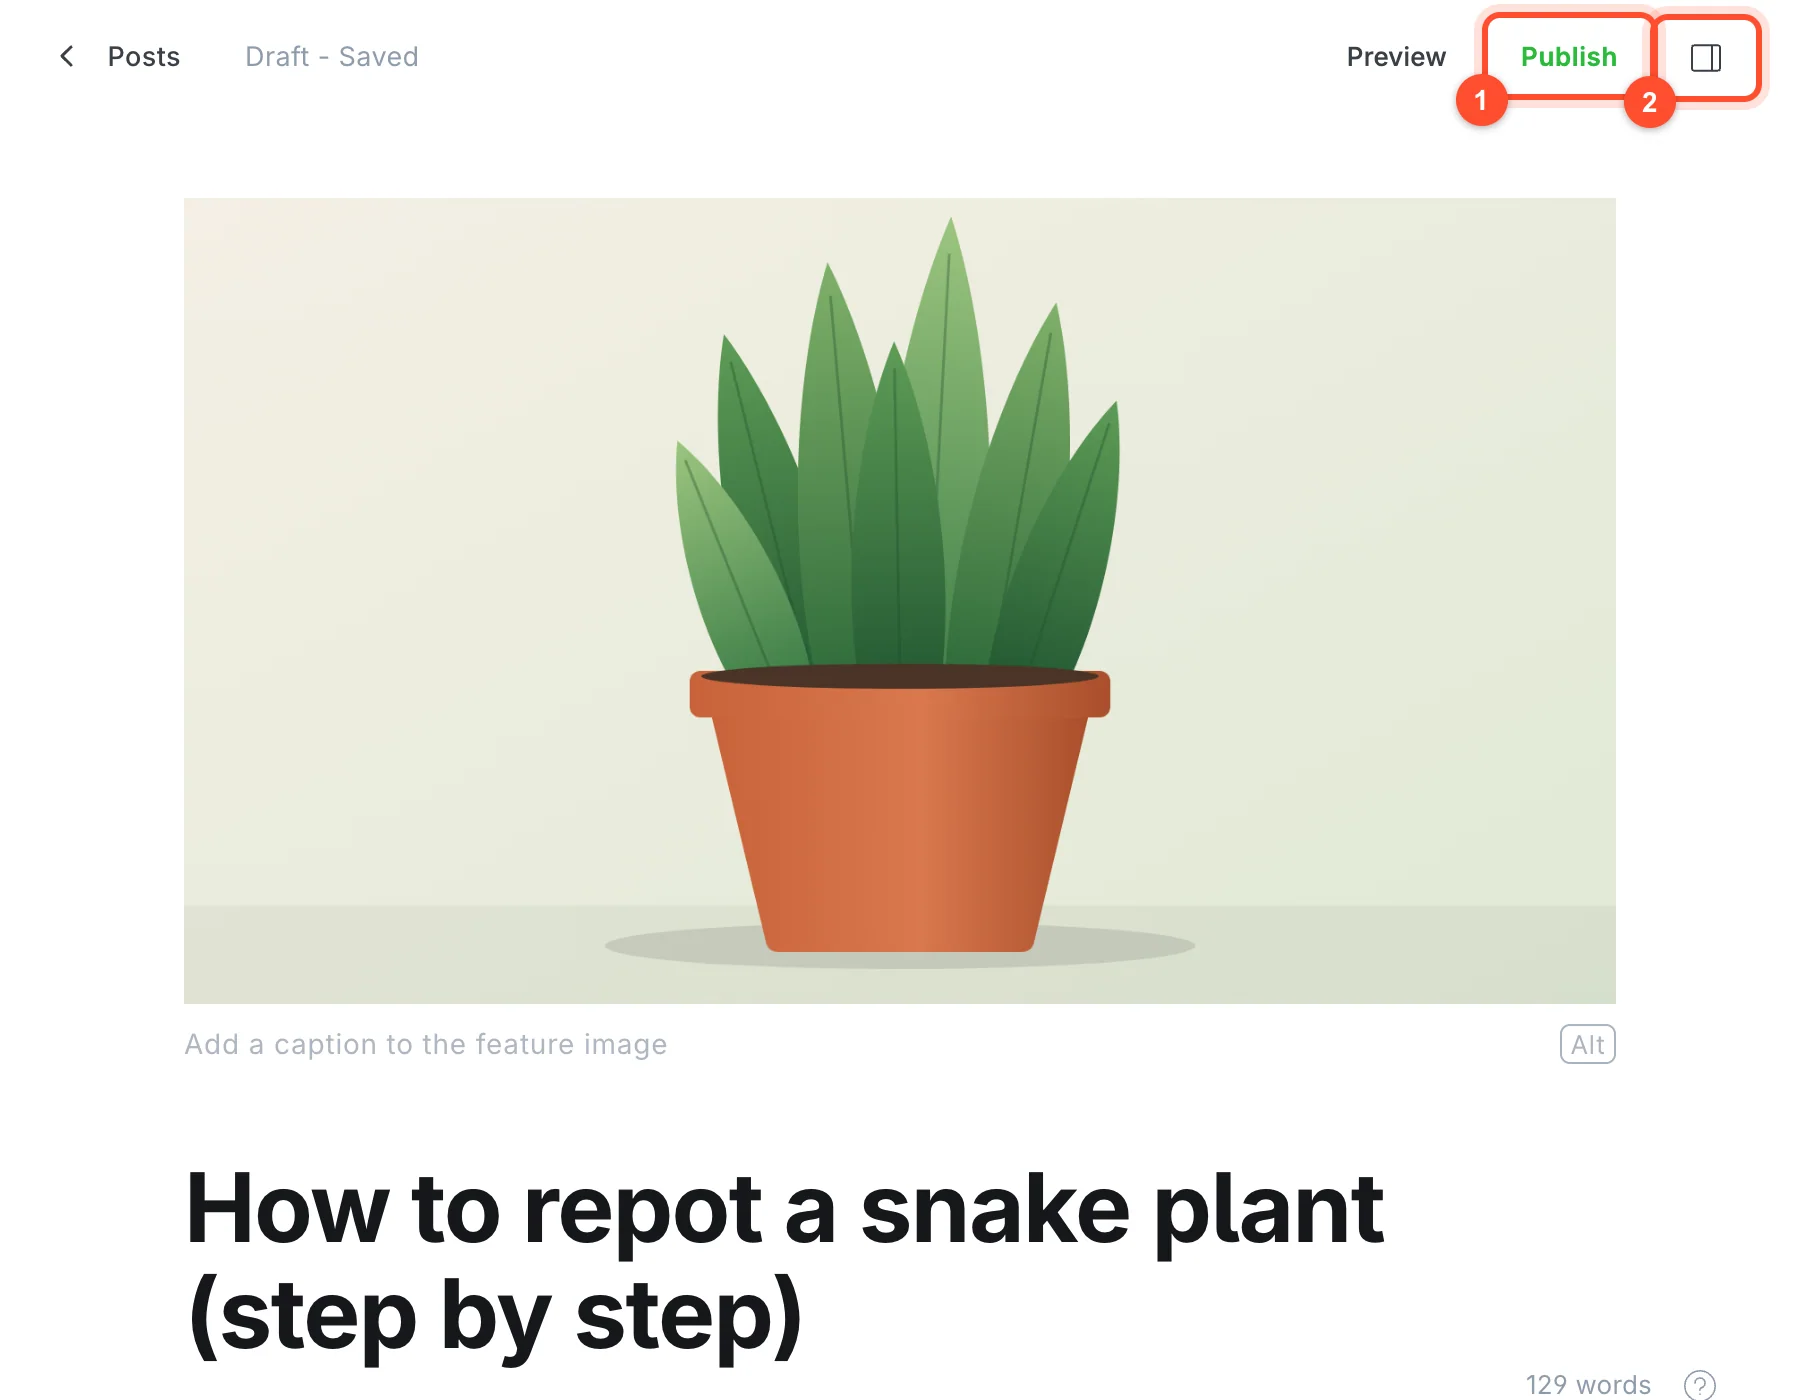
The editor has a title field and a body underneath. The top bar shows Draft - Saved, because Ghost saves a draft automatically as you type. There is no save button to hunt for, and closing the tab does not lose your work.
Step 2: Write the title and the first paragraph
Type your title, then press Enter to drop into the body. Two habits pay off here.
- Put the topic in the title, in plain words. "How to repot a snake plant" beats "Giving your plant a fresh start". People search in plain words and so does Google.
- Answer the question in the first paragraph. Readers decide within a few seconds whether the page is what they wanted. Say what the post covers and who it is for straight away.
Step 3: Add a feature image
Hover above the title and click Add feature image. This is the large image shown at the top of the post, on your homepage and when the link is shared.
Under the image you will see a caption line and a small Alt button. Click Alt and describe what the picture shows in one short sentence.
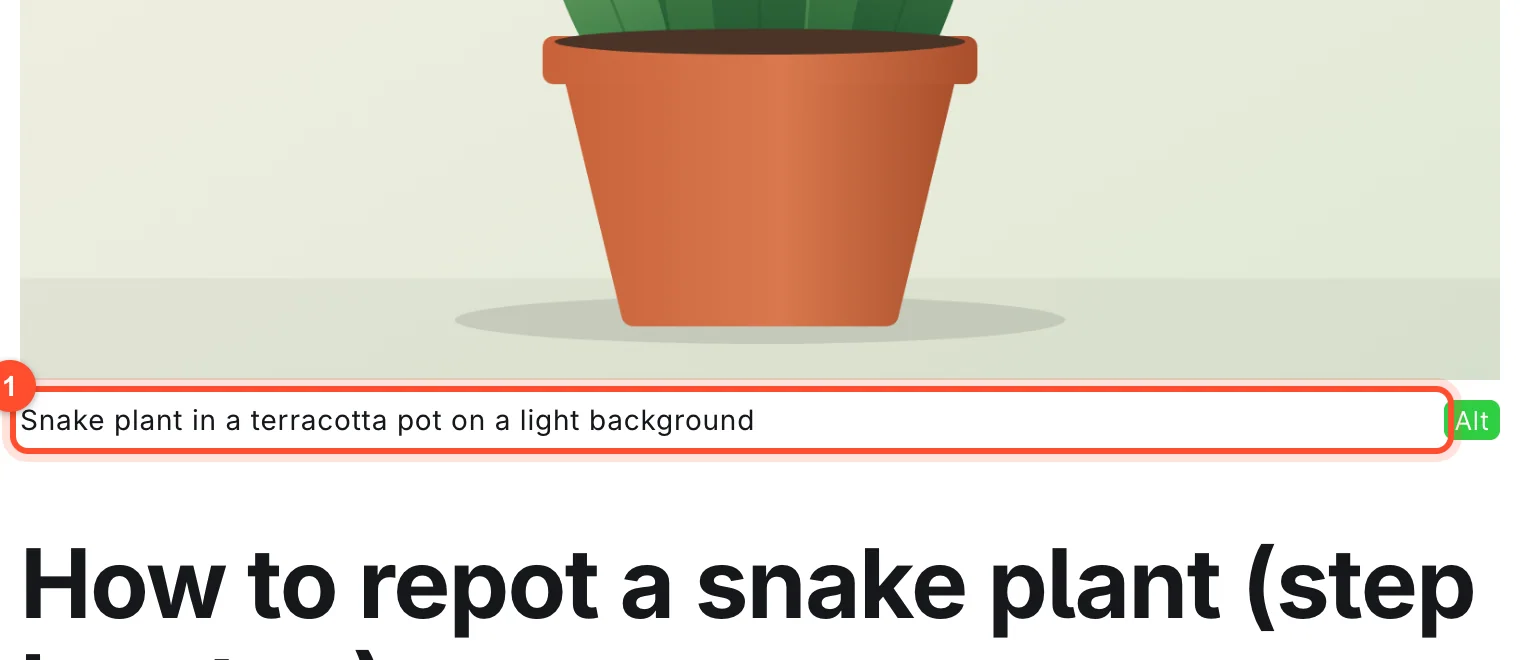
Alt text helps people using screen readers and gives search engines a clue about the image. Our image guide covers sizes and file formats.
Step 4: Write and format the body
Write the way you would in any word processor. Three things make formatting fast:
- Type
##at the start of a line for a heading,-for a bullet list and>for a quote. - Select text and press
Ctrl+K(orCmd+Kon a Mac) to add a link. - Type
/on an empty line to open the card menu, where you can add images, galleries, buttons, callouts, embeds and more.
Use headings to break the post into sections. Ghost styles them for you, and they give readers a way to skim. The full list of shortcuts and cards is in our editor guide.
Step 5: Set the post URL, tags and excerpt
Click the icon at the far right of the top bar to open Post settings. It holds a lot, but three fields matter before you publish:
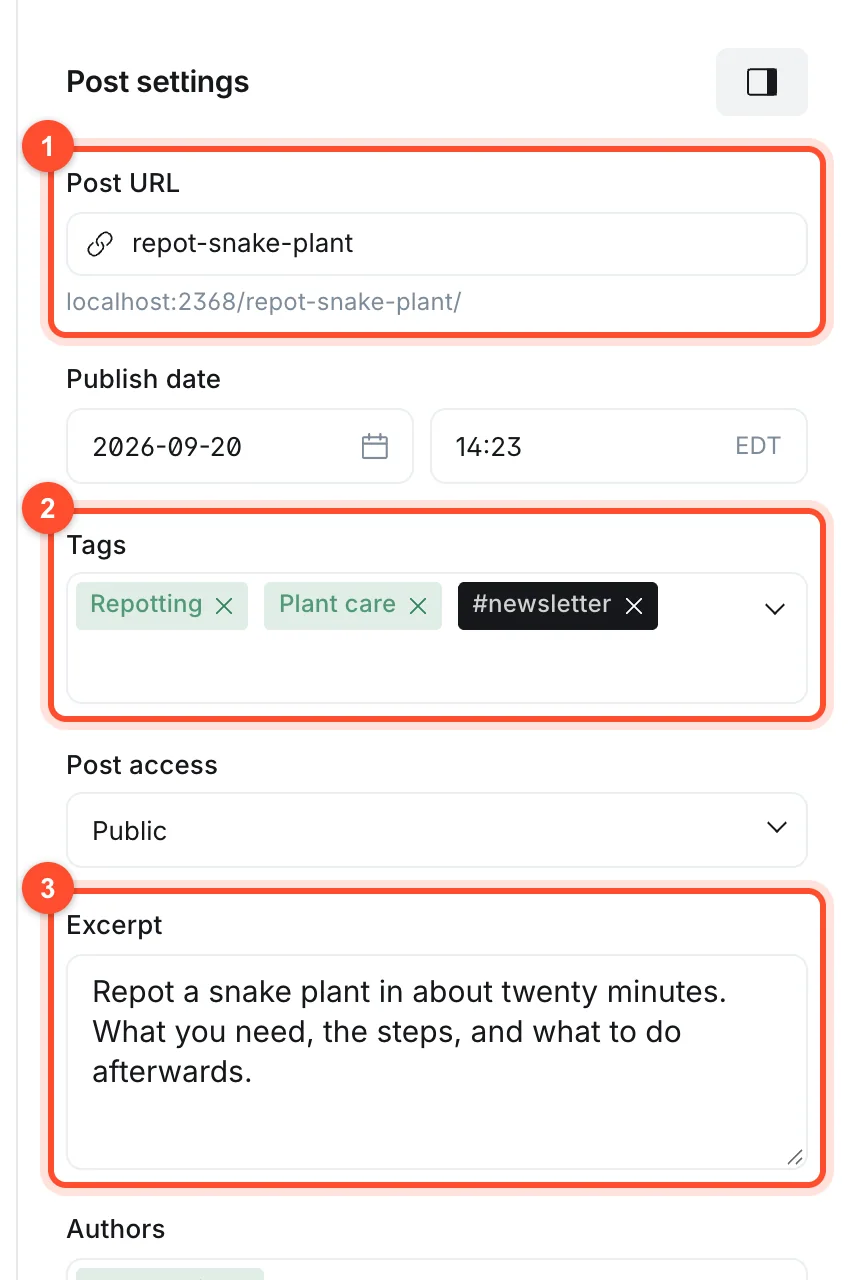
- Post URL. This is the slug, the last part of the address. Ghost fills it from your title and
shows the full address underneath. Shorten it to the essential words, for example
repot-snake-plant. Set it now, because changing it after the post is live can break links people already have. - Tags. Add one to three. The first tag becomes the primary tag. See how to use tags in Ghost.
- Excerpt. A one or two sentence summary shown on listing pages and used as a fallback description. Write it for a human who has not read the post yet.
Below these you will also find Publish date, Post access (public, members only or paid members), Authors, a Feature this post switch, Code injection, Meta data and Post history. The Meta data section lets you override the search title and description. It is worth filling in for posts you want to rank, and our Ghost SEO settings guide explains exactly what to enter.
Step 6: Preview it
Click Preview in the top bar. Ghost shows the post on your site's real design, with Web and Email tabs, desktop and mobile toggles, and a menu to see it as a free member would.
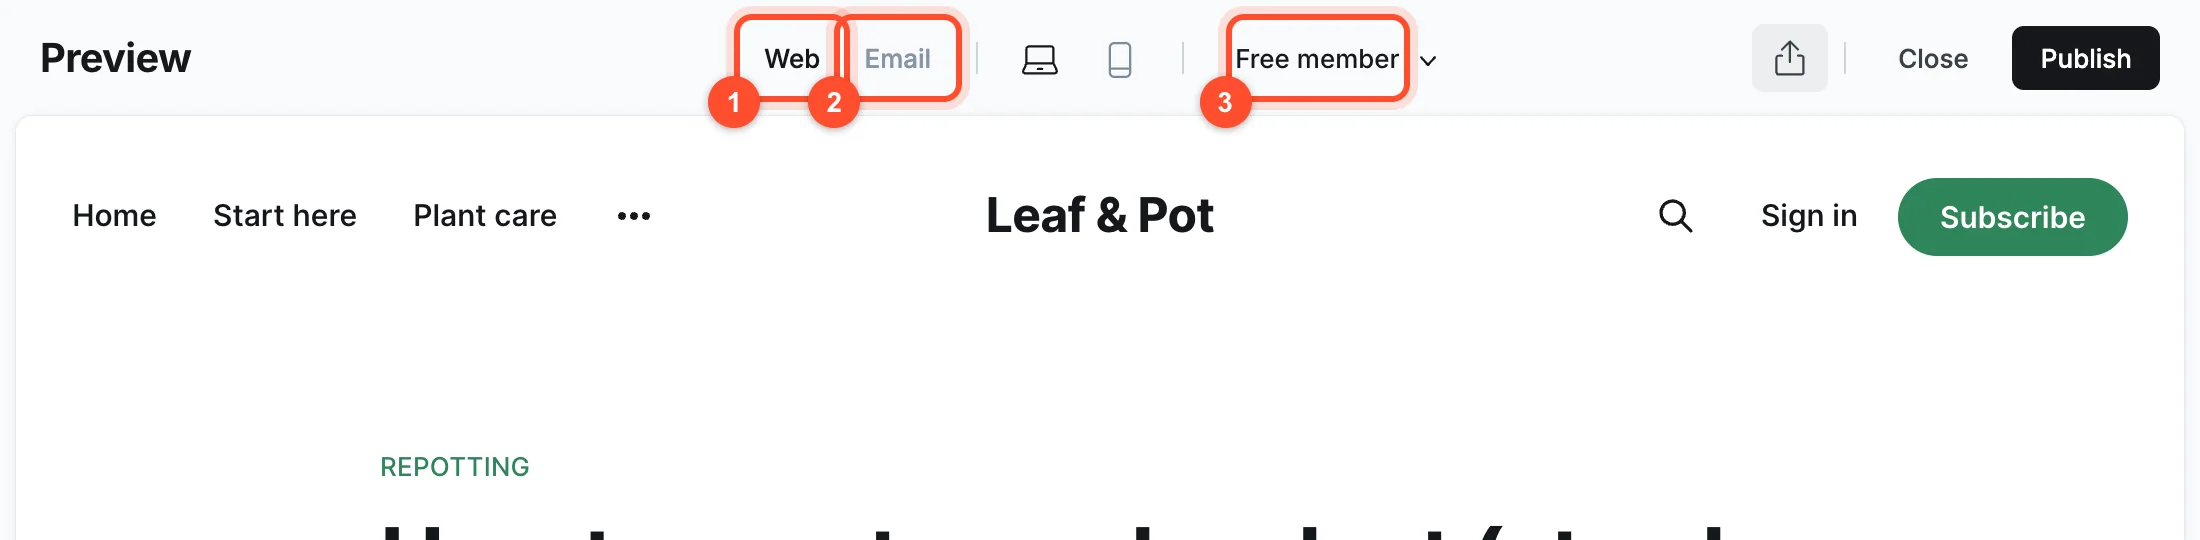
Look at the mobile view. Around half of your readers will be on a phone, and a wide table or an oversized image that looks fine on your laptop can spill off a small screen.
Step 7: Publish
Click Publish. Ghost opens a full-screen publish flow headed "Ready, set, publish."
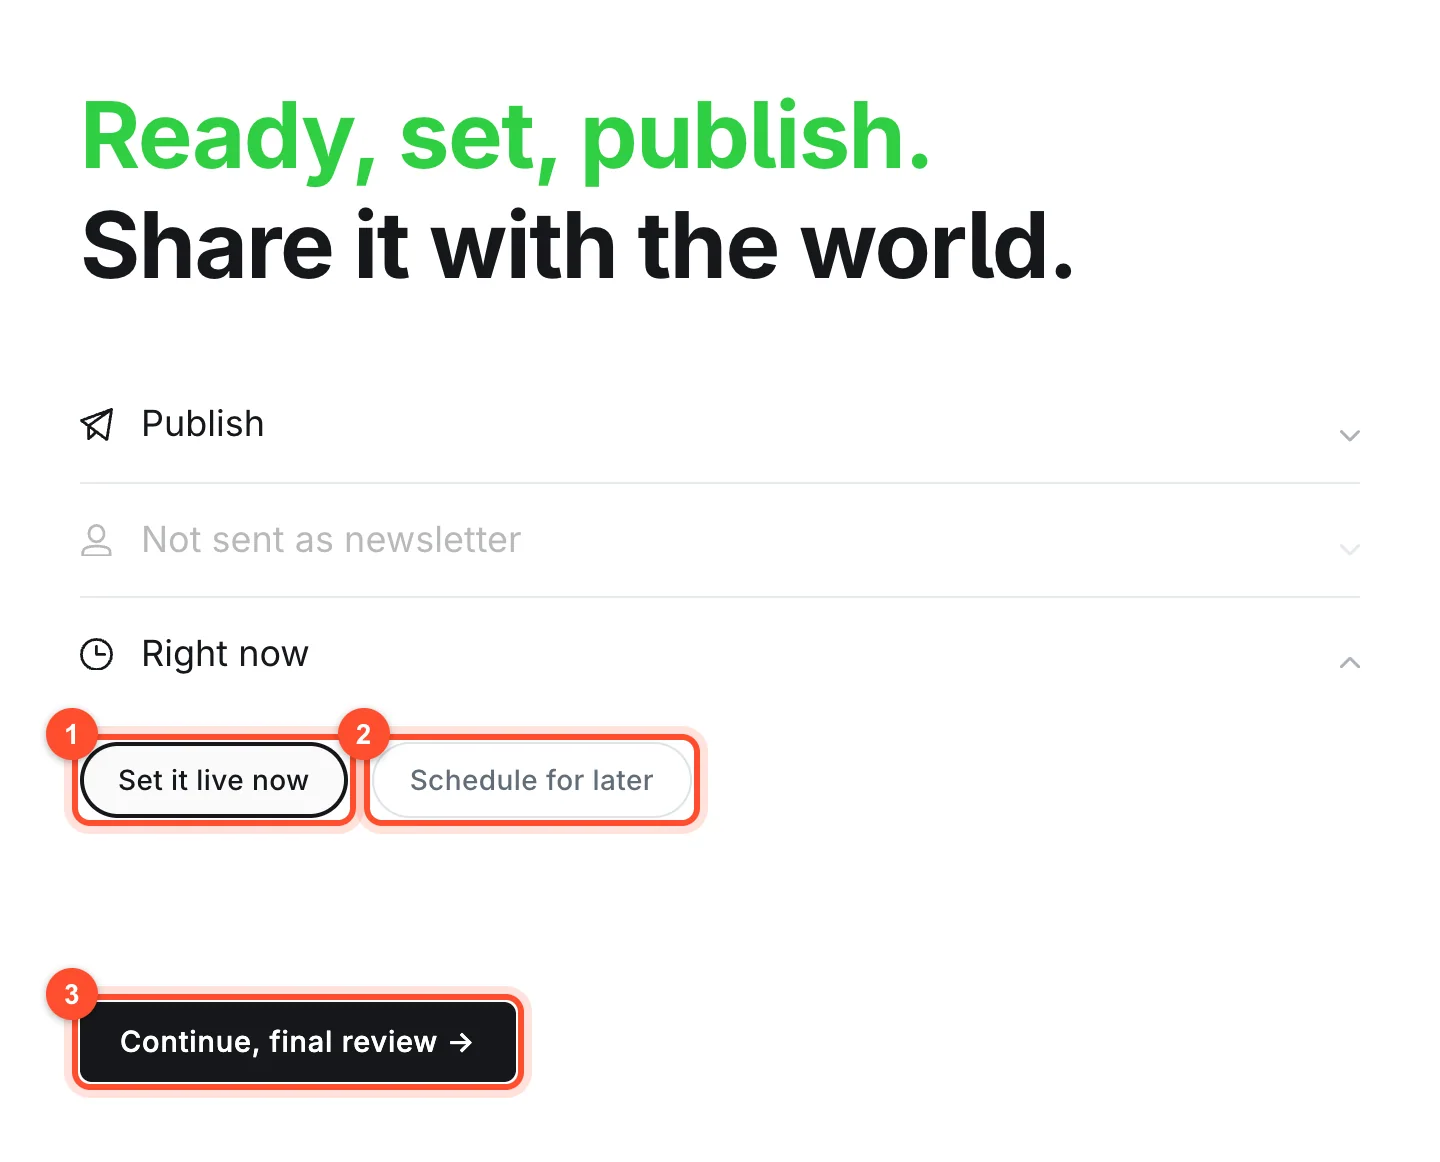
- The Publish row controls what happens to the post.
- The newsletter row is greyed out with the words "Not sent as newsletter" until you have set up members and newsletters, so on a new site you can ignore it.
- Click the Right now row to open it, then choose Set it live now, or Schedule for later to pick a date and time.
- Click Continue, final review.
On the last screen Ghost says "Your post will be published on your site."
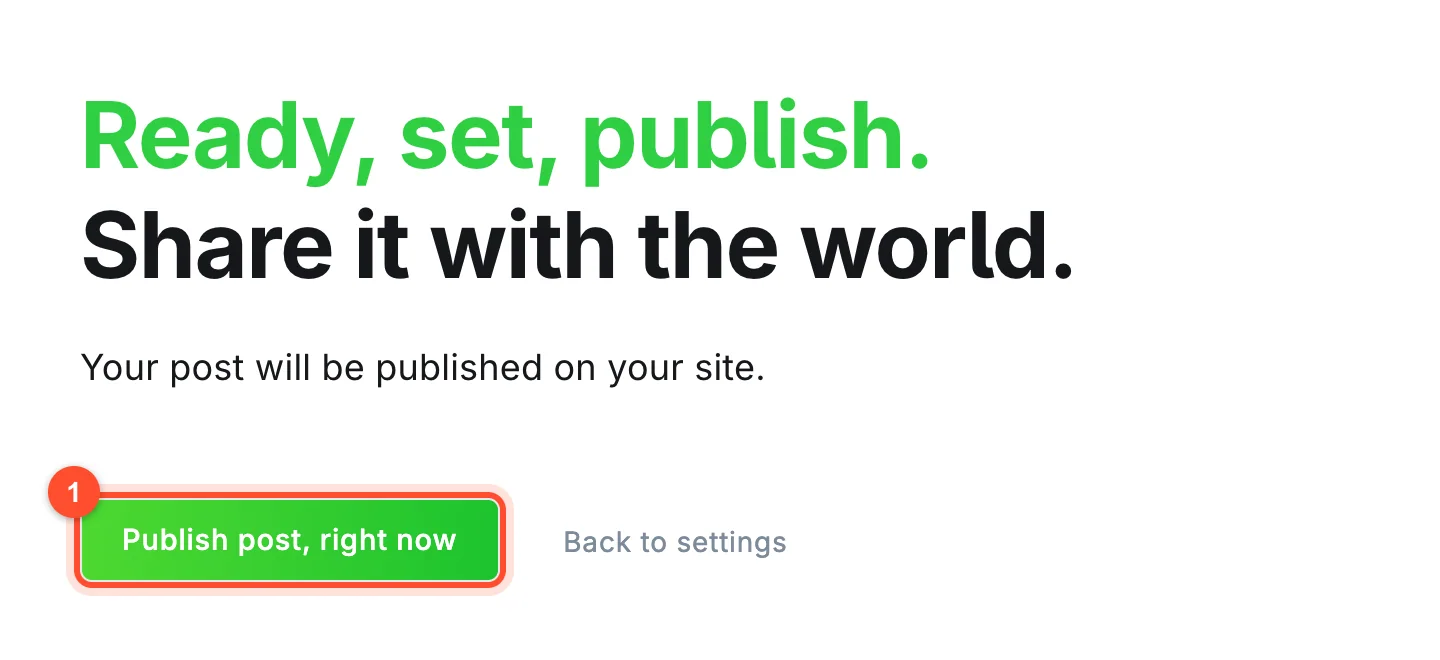
Click Publish post, right now, or Back to settings if you want to change something. To publish on a timetable, see how to schedule posts in Ghost.
Step 8: Check it as a visitor would
Open the live URL in a private browser window so you are not signed in. Check the title, the images, the links and the mobile layout once more. Then, if you have connected Google Search Console, paste the URL into its inspection box and request indexing. That speeds up the first crawl. Setting it up is covered in the SEO settings guide.
Mistakes to avoid on your first post
| Mistake | Why it hurts | Fix |
|---|---|---|
| Leaving the default URL slug | Long slugs look untidy and dilute the topic | Shorten it before publishing |
| No alt text on images | Poor accessibility, lost image search | Add a sentence per image |
| Publishing without a preview | Broken layout on mobile goes unnoticed | Always check the mobile view |
| No tags | Readers cannot find related posts | Add one to three |
| Editing the URL later | Old links stop working | Decide it now |
FAQ
Do I have to save my Ghost post?
No. Ghost saves drafts automatically while you type, and the top bar shows Draft - Saved. A post stays a draft, invisible to readers, until you publish it.
Can I write Ghost posts in Markdown?
Yes. Typing shortcuts like ## for headings and - for lists converts as you type. For longer
Markdown you can paste in, add a Markdown card by typing /md.
How long should a Ghost post be?
As long as it takes to answer the question properly. Many useful tutorials run 800 to 1,500 words, but a clear 400 word answer beats a padded 1,500 word one.
How do I change a post's publish date?
Open Post settings and edit the Publish date. You can set a past date to back-date an imported post, or use Schedule for later in the publish flow to release it in the future.
Can I unpublish a post?
Yes. Open the post, click Unpublish in the top bar and confirm. The post returns to a private draft and its page stops loading for visitors.
Want to try this on your own site? Create your Ghost blog and follow along. Plans start at $5/month and your site is live in about a minute.